
Kenmore Vacuum Model 116 Owners Manual: A Comprehensive Guide
This manual details the Kenmore Progressive Upright Vacuum, Model 116 (including 116.35922500), offering safety tips and parts diagrams for optimal home use.
Welcome to the world of efficient cleaning with your Kenmore Progressive Upright Vacuum, Model 116! This vacuum is designed for powerful suction and versatile cleaning across various floor types. This comprehensive guide serves as your primary resource for understanding, operating, and maintaining your new appliance. Whether you have the standard model or a variation like 116.35922500, this manual provides essential information.
We’ll cover everything from initial setup and operation to troubleshooting common issues, ensuring years of reliable performance. Prioritize safety by carefully reviewing the precautions outlined within. Explore the attachments and features designed to make your cleaning routine easier and more effective. Let’s begin maximizing your Kenmore 116’s potential!
Understanding Model Numbers and Variations (116.35922500, etc.)
Kenmore Vacuum Model 116 encompasses several variations, identified by unique model numbers like 116.35922500 and potentially others. While core functionality remains consistent across these models, slight differences in features or included attachments may exist. The primary model number, 116, signifies the series, while the subsequent digits denote specific configurations.
This manual aims to cover the majority of these variations; however, minor discrepancies are possible. Always refer to the specific documentation included with your vacuum for details pertaining to your exact model. Knowing your model number is crucial when ordering replacement parts or seeking specialized support. Keep it readily available for future reference and efficient service.
Assembly and Initial Setup
Proper assembly ensures optimal performance. Carefully unpack all components and follow the included instructions to correctly assemble your Kenmore Model 116 vacuum.
Unboxing and Component Identification
Upon receiving your Kenmore Model 116 vacuum, carefully open the box and verify all listed components are present. You should find the main vacuum body, the extension wand, a crevice tool, a dusting brush, and potentially other attachments depending on the specific model variation.
Inspect each part for any shipping damage before proceeding. Refer to the parts diagram included in this manual or available online (KEN-804347) to confirm you have everything needed. Familiarize yourself with the names and functions of each component – the dust bag or canister, the brush roll, the suction control settings, and the power cord.
Retain the original packaging for potential future transport or warranty claims. A complete inventory now will simplify the assembly process and ensure a hassle-free experience.
Assembling the Vacuum Cleaner
Begin assembly by securely attaching the handle to the main vacuum body, ensuring it clicks firmly into place. Next, connect the extension wand to the vacuum’s inlet, verifying a snug fit for optimal suction. Attachments, like the crevice tool and dusting brush, connect to the wand or directly to the vacuum, depending on your cleaning needs.
If your model utilizes a dust bag, insert it into the designated compartment, ensuring proper alignment. For canister models, confirm the canister is correctly installed and locked. Double-check all connections to prevent air leaks and maintain powerful cleaning performance.
Refer to the included parts diagram (KEN-804347) for visual guidance if needed.
Initial Inspection and Pre-Use Checks
Before first use, carefully inspect the Kenmore Model 116 for any visible damage sustained during shipping. Verify all assembled parts are securely connected – handle, wand, attachments, and dust bag/canister. Ensure the brush roll spins freely without obstruction.
Check the power cord for cuts or fraying. Confirm the dust bag or canister is properly installed to prevent dust leakage. A quick visual inspection of the filters is also recommended, ensuring they are clean and correctly positioned.
Always test the vacuum on a small, inconspicuous area of your flooring first to confirm compatibility and avoid potential damage.

Operating Instructions
To begin, plug in your Kenmore 116 vacuum. Utilize the power button for operation, adjusting suction as needed for various floor types and attachments.
Powering On and Off
The Kenmore Model 116 vacuum features a straightforward power operation. Locate the power button, typically found on the main body of the vacuum cleaner, often near the handle or control panel. Press the power button once to initiate the cleaning process; a clear indication, such as a light or motor hum, will confirm activation.
To cease operation, simply press the power button again. Ensure the vacuum completely stops before disconnecting from the power outlet. Avoid abruptly pulling the cord to turn off the vacuum; this can damage the electrical components. Always unplug the vacuum before performing any maintenance or troubleshooting procedures. Proper powering on and off extends the life of your Kenmore 116.
Adjusting Suction Control
The Kenmore Model 116 vacuum incorporates adjustable suction control, allowing for versatile cleaning across various surfaces. This feature is crucial for preventing damage to delicate items like curtains or lightweight rugs, and maximizing efficiency on carpets. Locate the suction control dial or slider, usually positioned on the vacuum body or handle.
Rotating or sliding the control adjusts the airflow. Lower settings are ideal for sensitive surfaces, minimizing disturbance, while higher settings provide powerful suction for deep carpet cleaning. Experiment with different levels to find the optimal setting for each cleaning task. Regularly check the suction power and adjust as needed to maintain peak performance and protect your floors and furnishings.
Using Attachments (Crevice Tool, Dusting Brush, etc.)
Your Kenmore Model 116 vacuum comes equipped with several attachments to enhance its cleaning versatility. The crevice tool is perfect for reaching tight spaces like corners, along baseboards, and between cushions. The dusting brush gently cleans delicate surfaces, furniture, and lampshades, preventing scratches.
To utilize these attachments, locate the hose connection point on the vacuum. Securely attach the desired tool to the hose. For optimal performance, adjust the suction control as needed – lower settings are recommended for delicate surfaces. Regularly inspect attachments for blockages and clean them to maintain effective suction. Proper attachment use extends the vacuum’s cleaning capabilities significantly.
Maintenance and Cleaning
Regular upkeep, including dust bag/canister emptying, filter checks, and brush roll cleaning, ensures peak performance and extends the life of your Kenmore 116.
Emptying the Dust Bag/Canister
Maintaining optimal suction requires regularly emptying the dust collection system. For bag models, locate the bag compartment – typically with a clear lid indicating fill level. Gently remove the full bag, avoiding forceful shaking to prevent dust dispersal. Replace with a new, genuine Kenmore bag, ensuring a secure seal.
Canister models feature a dust canister that detaches for emptying. Release the canister, open the lid carefully over a trash receptacle, and empty the contents. Rinse the canister with water (ensure it’s completely dry before reattaching) and clean the filter simultaneously. Always check for blockages during emptying.
A full bag or canister significantly reduces cleaning effectiveness.
Filter Cleaning and Replacement
Maintaining clean filters is crucial for consistent suction and air quality. The Kenmore Model 116 utilizes multiple filters – a pre-motor filter and potentially a HEPA filter. Regularly check both; the pre-motor filter is washable, allowing rinsing with cool water and complete air drying before reuse. Never operate the vacuum with a wet filter!
HEPA filters, designed for capturing microscopic particles, are not washable. Replace the HEPA filter according to the manufacturer’s recommendations (typically every 6-12 months, or more frequently with heavy use). A clogged or damaged filter reduces airflow and can strain the motor. Genuine Kenmore replacement filters are recommended for optimal performance.
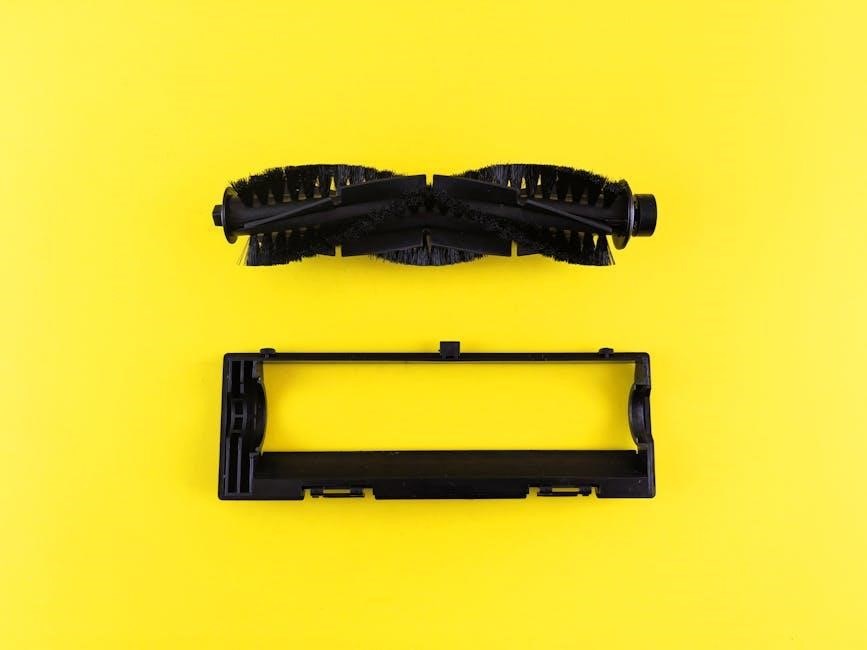
Brush Roll Maintenance (Removing Hair and Debris)
Consistent brush roll maintenance ensures effective carpet cleaning. Over time, hair, string, and debris can wrap around the brush roll, reducing its spinning ability and cleaning power. Always disconnect the vacuum from power before performing any maintenance!
To remove debris, locate the brush roll access panel (usually on the underside of the vacuum). Carefully remove the brush roll and use scissors or a seam ripper to cut away any tangled materials. Avoid damaging the bristles! Inspect the end caps for wear and replace if necessary. Reinstall the brush roll, ensuring it spins freely. Regular cleaning prevents motor strain and extends the life of your Kenmore 116.
Troubleshooting Common Issues
This section addresses frequent problems with your Kenmore 116, like suction loss, a non-spinning brush roll, or motor overheating—find quick solutions here!
Vacuum Loses Suction
If your Kenmore Model 116 experiences a loss of suction, several factors could be at play. First, always check if the dust bag or canister is full and needs emptying. A full container significantly restricts airflow.
Next, inspect the filters – a clogged filter is a common culprit. Ensure both the pre-motor and post-motor filters are clean and properly installed. Consider replacing them if cleaning doesn’t restore suction.
Also, thoroughly examine the hose, wand, and attachments for any blockages. Disconnect these components and visually inspect for obstructions like debris or tangled hair. Finally, verify the brush roll is free from entanglement, as this can also impede airflow and reduce suction power.
Brush Roll Not Spinning
A non-spinning brush roll on your Kenmore Model 116 often indicates an obstruction. Immediately power off the vacuum and disconnect it from the electrical outlet for safety. Carefully inspect the brush roll for tangled hair, string, or carpet fibers – remove any debris found.
Next, check the brush roll belt. A broken or stretched belt will prevent the brush roll from rotating. Replacement belts are readily available. Ensure the belt is correctly seated in its grooves.
If the belt is intact and the brush roll remains stationary, there might be an issue with the motor or the brush roll’s drive mechanism; professional servicing may be required in such cases.
Motor Overheating
If your Kenmore Model 116 vacuum motor overheats, the unit will likely shut off automatically as a safety precaution. Immediately unplug the vacuum from the power outlet and allow it to cool down completely – at least 30 minutes.
Motor overheating is frequently caused by a clogged filter, a full dust bag/canister, or restricted airflow due to obstructions in the hose or nozzle. Ensure these components are clean and unobstructed before restarting the vacuum.
Avoid prolonged vacuuming of heavy debris or operating the vacuum continuously for extended periods. If overheating persists after addressing these issues, professional repair is recommended, as it could indicate a more serious motor problem.
Safety Precautions
Always prioritize safety when using your Kenmore 116 vacuum; follow general guidelines, electrical safety rules, and avoid damaging surfaces during operation.
General Safety Guidelines
Before operating your Kenmore Model 116 vacuum, carefully read all instructions within this manual to ensure safe and effective use. This appliance is designed for household cleaning only; avoid using it for commercial purposes or on hazardous materials.
Never operate the vacuum with a damaged cord or plug. If the cord is damaged, it must be replaced by a qualified technician to prevent electrical hazards. Always disconnect the vacuum from the power outlet before performing any maintenance or troubleshooting.
Keep children and pets away from the operating vacuum. Do not allow children to use the vacuum as a toy. Be cautious when vacuuming near stairs. Never point the hose or nozzle at people or animals while the vacuum is running.
Electrical Safety
To minimize the risk of electric shock, always ensure the Kenmore Model 116 vacuum is properly grounded. Never operate the vacuum with a damaged power cord or plug; immediate replacement is crucial. Avoid using extension cords unless absolutely necessary, and if used, ensure they are heavy-duty and rated for the vacuum’s amperage.
Do not immerse the vacuum, cord, or plug in water or other liquids. Unplug the vacuum before cleaning or performing any maintenance. Inspect the power cord regularly for damage, and discontinue use if any damage is detected.
Avoid pulling or carrying the vacuum by the power cord. If the vacuum malfunctions or experiences electrical issues, disconnect it immediately and consult a qualified service technician.
Avoiding Damage to Surfaces
Protect your floors and furniture while using the Kenmore Model 116 vacuum. Test the vacuum on an inconspicuous area before cleaning delicate surfaces like hardwood floors or area rugs. Utilize the appropriate attachments – the dusting brush for furniture and the floor brush for hard surfaces – to prevent scratching.
Avoid vacuuming over electrical cords or loose rugs, as these can cause damage to both the vacuum and the surface. Be cautious when maneuvering around furniture legs and sharp corners.
Do not apply excessive force when vacuuming, and avoid prolonged contact with a single spot. Regularly inspect the brush roll for debris that could scratch surfaces.