
Brother XR1355 Sewing Machine Manual: A Comprehensive Guide
This guide offers detailed instructions, PDF downloads, and troubleshooting for the Brother XR1355. Access manuals, explore online resources, and learn about the foot control pedal.
The Brother XR1355 is a popular, user-friendly sewing machine designed for both beginners and experienced sewists. This comprehensive guide will navigate you through every aspect of operating and maintaining your machine. Finding a replacement manual is easy, with readily available PDF versions accessible through the Brother Solutions Center.
Whether you’ve misplaced your original documentation or prefer digital access, this resource provides detailed instructions. It covers everything from initial setup to advanced techniques, ensuring you maximize the potential of your XR1355. Explore troubleshooting tips and learn about compatible accessories, including the foot control pedal, to enhance your sewing experience. This machine is known for its reliability and versatility.
Key Features and Specifications
The Brother XR1355 boasts 36 built-in stitches, offering versatility for various sewing projects. It includes seven automatic buttonhole styles, simplifying garment construction. This machine features an automatic needle threader, saving time and frustration. Adjustable sewing speed and stitch length/width controls provide customization.
Its lightweight design enhances portability, while the free arm facilitates cuff and sleeve sewing. The XR1355 is compatible with a range of optional presser feet, expanding its capabilities. The manual details these specifications. It operates with a standard household electrical outlet. Accessing the PDF manual provides a complete list of features and technical details, ensuring optimal performance and understanding of your sewing machine.
Unboxing and Initial Setup
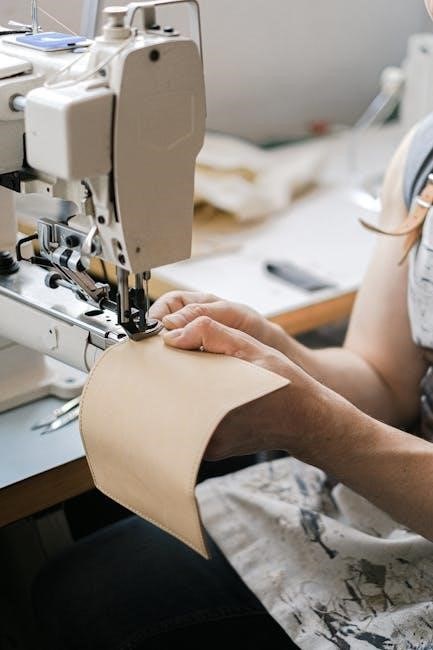
Upon unboxing your Brother XR1355, carefully inspect all components against the parts list in the manual. Ensure you have the machine, power cord, foot controller, accessories, and documentation. Place the machine on a stable, flat surface. Connect the power cord and foot controller.
Before first use, consult the manual for proper bobbin winding and insertion. Thread the machine following the numbered diagram – a crucial initial step. Select a basic stitch and test sew on scrap fabric. Familiarize yourself with the control panel and stitch selection dial. Refer to the PDF manual for detailed illustrations and troubleshooting tips during setup. Proper initial setup ensures smooth operation.

Understanding the Machine Components
Explore the Brother XR1355’s main body, control panel, presser foot mechanisms, and bobbin system. The manual details each part’s function for optimal use.
Main Body and Stitch Formation
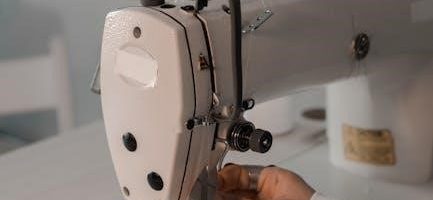
The Brother XR1355’s main body houses the intricate mechanisms responsible for stitch creation. Understanding this core functionality is vital for successful sewing. The machine utilizes a hook and shuttle system to interlock the upper and lower threads, forming a secure stitch.
Refer to your manual for detailed diagrams illustrating the path of the thread from the spool, through the tension discs, and finally to the needle. Proper threading is crucial for consistent stitch quality. The body’s robust construction ensures durability and stability during operation.
Different stitch patterns are achieved by varying the movement of the needle and feed dogs, as explained within the comprehensive Brother XR1355 manual. Familiarize yourself with these mechanisms to unlock the machine’s full potential.
Control Panel Overview
The Brother XR1355’s control panel is intuitively designed for ease of use. It features clearly labeled buttons and a digital display for selecting stitch patterns, adjusting settings, and monitoring machine status. The stitch selection dial allows you to quickly choose from a variety of built-in stitches, detailed in your manual.
Buttons control functions like needle up/down, reverse stitching, and speed adjustment. The LCD screen displays the selected stitch number, length, and width. Consult the Brother XR1355 manual for a complete explanation of each button and display indicator.
Understanding the control panel is key to customizing your sewing projects. The manual provides visual aids and step-by-step instructions for navigating the panel’s features effectively.
Bobbin Winding and Insertion
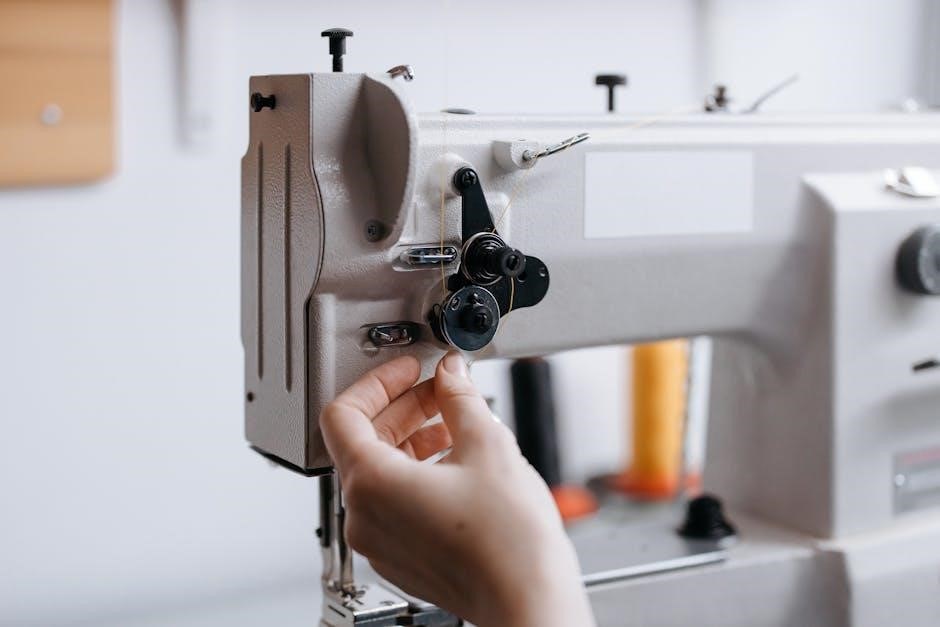
Proper bobbin winding is crucial for consistent stitch quality on your Brother XR1355. The manual details how to correctly thread the bobbin with thread, guiding it through the tension disc. Engage the bobbin winding mechanism, ensuring even distribution onto the bobbin core.
Once wound, carefully insert the bobbin into the bobbin case, following the diagram in the manual. Ensure the thread runs smoothly through the tension spring. Incorrect insertion can cause thread nests and uneven stitches.
The Brother XR1355 manual provides clear illustrations and troubleshooting tips for common bobbin winding and insertion issues. Refer to it for optimal performance.
Presser Foot Mechanisms
The Brother XR1355 features versatile presser foot mechanisms, detailed in the manual. Understanding these is key to achieving various sewing techniques. The manual illustrates how to easily attach and detach different presser feet, expanding the machine’s capabilities.
Learn about the standard zig-zag foot, and how optional feet – like buttonhole or zipper feet – enhance specific projects. The manual explains the importance of correct foot selection for optimal fabric handling and stitch formation.
Adjusting presser foot pressure is also covered, allowing for precise control on different fabric weights. Refer to the manual for detailed diagrams and troubleshooting tips related to presser foot operation.
Basic Operation: Getting Started
The manual guides you through threading, bobbin winding, stitch selection, and adjustments. Begin your sewing journey with these fundamental steps for the XR1355.
Threading the Machine
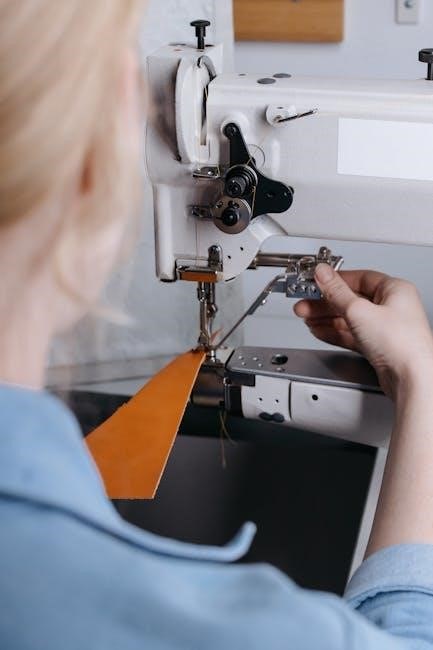
Proper threading is crucial for successful sewing with your Brother XR1355. Begin by ensuring the machine is turned off and the presser foot is raised. The manual details a clear, step-by-step process, starting with the spool pin and guiding the thread through the tension discs.
Next, thread the take-up lever, ensuring the thread is securely seated. Continue down to the needle clamp, threading the needle from front to back. Refer to the diagrams in the PDF manual for visual assistance. Incorrect threading can cause skipped stitches or tension issues. Always double-check that the thread is properly seated in each guide before beginning to sew. A correctly threaded machine ensures smooth and consistent stitch formation.
Winding the Bobbin
Winding the bobbin correctly is essential for consistent stitching on your Brother XR1355. First, place the spool of thread on the spool pin. Then, guide the thread through the designated bobbin winding tension disc. Attach the empty bobbin to the bobbin winder spindle, ensuring it clicks into place.
Following the manual’s instructions, push the bobbin winder to the right and press the foot pedal gently to begin winding. Allow the bobbin to fill evenly, stopping when nearly full. The PDF manual provides detailed diagrams. Incorrect winding can lead to uneven tension and poor stitch quality. Always use the correct type of bobbin for your machine, as specified in the documentation.
Selecting Stitch Patterns
The Brother XR1355 offers a variety of built-in stitch patterns for diverse sewing projects. To select a stitch, refer to the manual and locate the stitch selection dial on the control panel. Rotate the dial to the desired stitch number, clearly indicated with corresponding diagrams.
The PDF manual details each stitch’s purpose – straight stitch, zigzag, blind hem, and decorative options. Ensure the machine is set to the correct stitch width and length for optimal results. Experiment with different stitches on scrap fabric before starting your project. Understanding each stitch’s function, as outlined in the instruction guide, will enhance your sewing experience.
Adjusting Stitch Length and Width
Precise control over stitch length and width is crucial for quality sewing. The Brother XR1355 manual illustrates how to use the dedicated dials to adjust these settings. Stitch length determines the distance between stitches, impacting fabric strength and appearance; Shorter lengths are ideal for delicate fabrics, while longer lengths suit heavier materials.
Stitch width controls the zigzag’s breadth, influencing seam finishing and decorative effects. Refer to the PDF guide for recommended settings based on fabric type and stitch selection. Always test adjustments on scrap fabric before sewing your project; Mastering these controls, detailed in the instruction booklet, ensures professional-looking results.

Advanced Features and Techniques
Explore optional presser feet, free-motion quilting, buttonholes, and zipper insertion with the Brother XR1355, as detailed in the manual.
Using Optional Presser Feet
The Brother XR1355’s versatility expands significantly with optional presser feet, enhancing your sewing capabilities for specialized projects. The manual details various feet, including a zipper foot for precise zipper applications, an overcast foot preventing fabric fraying, and a blind hem foot for professional-looking hems.
A buttonhole foot streamlines buttonhole creation, while a quilting foot facilitates even stitch distribution during quilting. Explore decorative feet for embellishments and a walking foot for handling multiple fabric layers or slippery materials. Correct foot attachment is crucial; the manual provides clear diagrams. Utilizing the appropriate presser foot unlocks the machine’s full potential, allowing for diverse and intricate sewing endeavors. Remember to consult the Brother Solutions Center for additional guidance and foot compatibility information.
Free Motion Quilting
Free motion quilting with the Brother XR1355 allows for creative stitch patterns beyond built-in designs. The manual guides you through setting up the machine for this technique, typically involving dropping the feed dogs and using a darning foot. This enables you to move the fabric freely under the needle, creating custom designs.
Practice is key to mastering free motion quilting; start with simple shapes and gradually progress to more complex patterns. Adjusting stitch length and tension is crucial for optimal results. The manual emphasizes the importance of a smooth, consistent hand movement. Explore online tutorials for visual demonstrations and inspiration. Remember to use appropriate batting and backing fabrics for best results, and always test on a scrap piece first.
Buttonhole Sewing
The Brother XR1355 simplifies buttonhole sewing with its one-step buttonhole foot. The manual provides clear, illustrated instructions on selecting the appropriate buttonhole setting based on your button size. It details how to attach the buttonhole foot and properly position the fabric. Accurate measurement of the button is vital for a perfectly sized buttonhole.
The machine automatically sews a consistent buttonhole shape, but the manual advises testing on scrap fabric first to ensure correct settings. It also explains how to reinforce the buttonhole ends for durability. For four-step buttonholes, follow the specific sequence outlined in the guide. Proper thread tension is crucial for a clean, professional finish.
Zipper Insertion
The Brother XR1355 manual details several zipper insertion techniques, including centered, overlapped, and invisible zippers. It recommends using the appropriate zipper foot for each method, ensuring close stitching along the zipper teeth. The guide illustrates how to position the zipper under the presser foot and adjust the needle for accurate alignment.
Step-by-step diagrams show how to begin and end the stitching securely, preventing zipper pull separation. The manual emphasizes the importance of a consistent seam allowance for a professional finish. It also provides guidance on handling different zipper types, like metal and plastic. Practice on scrap fabric is suggested before working on your final project.

Troubleshooting Common Issues
The XR1355 manual addresses needle breaking, thread jamming, uneven stitches, and error codes, offering solutions for smooth operation and consistent results.
Needle Breaking Problems
Frequent needle breakage with the Brother XR1355 often indicates incorrect needle size for the fabric weight. Always consult the manual for appropriate needle recommendations. Ensure the needle is correctly inserted – fully up into the clamp.
Incorrect threading is a common culprit; re-thread the machine following the manual’s diagrams precisely. Pulling or pushing the fabric while sewing can also stress the needle, leading to breakage. Verify the presser foot pressure is appropriately adjusted for the material.
Bent or damaged needles must be replaced immediately. Using a dull needle requires more force, increasing the risk of breakage. Finally, check for obstructions within the needle plate area before sewing.
Thread Jamming Solutions
Thread jamming on the Brother XR1355 is often resolved by re-threading both the upper and lower threads, meticulously following the manual’s diagrams. Ensure the presser foot is raised when threading, as this opens the tension discs. Clean the bobbin area thoroughly, removing any lint or debris that may obstruct smooth movement.
Incorrect tension settings can cause jamming; experiment with slight adjustments to both upper and lower tension. Verify you are using the correct type of thread for your fabric and needle. Avoid pulling the fabric while sewing, as this can strain the thread.
A properly wound bobbin is crucial; ensure it’s not too loose or too tight. Regular cleaning and lubrication, as outlined in the manual, prevent buildup.
Uneven Stitching Diagnosis
Uneven stitching on the Brother XR1355 often indicates a problem with threading, tension, or the needle. First, re-thread the machine, ensuring the thread is properly seated in all guides and the tension discs. Check the bobbin winding – an unevenly wound bobbin can cause inconsistent stitches.
Adjust the upper tension dial in small increments, testing after each adjustment. Ensure the correct needle type and size are being used for the fabric weight. A dull or damaged needle will produce poor stitch quality.
Verify the presser foot pressure is appropriate for the fabric; too much or too little pressure can affect stitch formation. Consult the manual for recommended settings.
Error Codes and Their Meanings
While the Brother XR1355 doesn’t display complex alphanumeric error codes, it can exhibit issues signaled by flashing lights or the machine stopping. A flashing needle indicator often suggests a threading problem – re-thread both the upper thread and bobbin. If the machine stops mid-stitch, check for tangled thread or a jammed bobbin case.
Consult the Brother solutions center or the PDF manual for specific troubleshooting steps related to these indicators. Incorrect bobbin insertion or a faulty needle can also cause operational halts. Ensure the power cord is securely connected, as intermittent power can mimic an error.
Refer to online tutorials for visual guidance on resolving common issues.
Maintenance and Care
Regular cleaning, lubrication, and needle replacement are vital for optimal performance. The manual provides a guide to ensure your Brother XR1355 remains reliable.
Cleaning the Machine
Consistent cleaning is crucial for maintaining the Brother XR1355’s performance and longevity. Always disconnect the machine from the power source before beginning any cleaning procedures. Use a soft brush, often included with the machine, to remove lint and dust from the bobbin area, feed dogs, and around the needle plate. A small vacuum cleaner with a brush attachment can also be helpful for removing stubborn debris.
For more thorough cleaning, a slightly dampened (not wet!) cloth can be used to wipe down the exterior surfaces. Avoid using harsh chemicals or abrasive cleaners, as these can damage the machine’s finish. Pay particular attention to areas where oil accumulates, as this can attract dust and grime. Refer to your Brother XR1355 manual for specific cleaning recommendations and diagrams, ensuring you follow the manufacturer’s guidelines for optimal results.
Lubrication Guide
Proper lubrication is vital for the smooth operation of your Brother XR1355 sewing machine. However, modern sewing machines, including the XR1355, often require minimal oiling. Over-oiling can attract dust and cause more problems than it solves. Consult your Brother XR1355 manual for specific lubrication points, as excessive oiling is generally discouraged.
Typically, only the bobbin race and the needle bar area may require occasional oiling. Use only sewing machine oil – never use household oil or grease. Apply a very small drop of oil to the designated areas, and then operate the machine briefly to distribute the oil evenly. Wipe away any excess oil to prevent staining or attracting lint. Regular cleaning, as outlined in the manual, often reduces the need for frequent lubrication.
Replacing the Needle
Regularly replacing the needle on your Brother XR1355 is crucial for maintaining stitch quality and preventing damage. A dull or bent needle can cause skipped stitches, thread breakage, and even harm the machine. Always use the correct needle type and size for your fabric. Refer to your Brother XR1355 manual for guidance.
To replace the needle, ensure the machine is turned off. Loosen the needle clamp screw, remove the old needle, and insert the new needle with the flat side facing the back. Tighten the screw securely. Always dispose of used needles safely to prevent injury. Inspect the needle regularly and replace it after approximately 8 hours of sewing or whenever you notice issues with stitch formation.
Belt Replacement
The belt in your Brother XR1355 connects the motor to the handwheel, driving the sewing mechanism. Over time, this belt can stretch, crack, or break, causing the machine to stop functioning. Replacing it restores power transmission and smooth operation. Consult your XR1355 manual for specific diagrams and instructions, as procedures can vary.
Typically, belt replacement involves removing the access panels, carefully detaching the old belt, and installing the new one, ensuring proper alignment around the motor pulley and handwheel. Securely reattach all panels. If you’re uncomfortable with this process, seeking professional repair is recommended to avoid damaging the machine. A correctly installed belt ensures quiet and efficient sewing.
Resources and Support
Access the Brother Solutions Center, PDF manuals, online tutorials, and videos for the XR1355. Find foot control information and assistance easily!
Downloading the PDF Manual
Locating the Brother XR1355 sewing machine’s PDF manual is straightforward. The Brother Solutions Center provides direct access to downloadable versions of the user manual. These digital manuals are often available in a zip folder containing PDF booklets, frequently including both English and Spanish language versions.
Alternatively, several websites offer free access to the XR1355 manual. These resources allow you to view the manual online or download it for offline use. A digital manual can be purchased for approximately 10080 rubles, with free delivery options available. Remember to verify the source’s reliability before downloading to ensure a safe and virus-free experience. Having the PDF manual readily available ensures you always have quick access to essential information and troubleshooting guidance.
Brother Solutions Center Access
The Brother Solutions Center is a vital resource for XR1355 owners. It provides direct access to your machine’s manual, resolving the issue of a lost physical copy. You can easily find the PDF manual by navigating to the center and searching for your specific model – XR1355.
This online hub offers more than just manuals; it’s a comprehensive support system. Users can ask questions and connect with other Brother XR1355 owners for advice and troubleshooting tips. The Solutions Center streamlines access to support, ensuring you can quickly find answers to your questions and maintain optimal machine performance. It’s a central location for all your Brother sewing machine needs.
Online Tutorials and Videos
Numerous online tutorials and videos cater specifically to the Brother XR1355 and similar models like the XR3140. These visual guides complement the PDF manual, offering step-by-step demonstrations of key features and techniques.
Instructional videos cover everything from basic threading and bobbin winding to more advanced operations like buttonhole sewing and zipper insertion. These resources are particularly helpful for visual learners, providing a clear understanding of each process. Searching platforms like YouTube with terms like “Brother XR1355 tutorial” will yield a wealth of helpful content, enabling users to maximize their sewing machine’s capabilities and troubleshoot common issues effectively.
Foot Control Pedal Information
The foot control pedal is essential for operating the Brother XR1355 sewing machine, regulating sewing speed with applied pressure. Compatible pedals are available for various Brother models, including the XR1300, XR1355, XR3140, XS2070, XS2080, and XS2100.
Replacement pedals can be purchased online, often shipped from the USA, ensuring continued functionality. Understanding the pedal’s operation is crucial for precise control during sewing projects. Deluxe model manuals sometimes include detailed diagrams. If experiencing issues, check the connection and ensure the pedal is firmly plugged in. Proper foot control allows for smooth, consistent stitching and enhances overall sewing precision with your Brother machine.