

Goodman GM9S80 Installation Manual: A Comprehensive Guide
Welcome to a New World! This guide opens the doors to new possibilities with your Goodman GM9S80.
Familiarize yourself with the packaging before discarding it; central personalization of Windows settings allows effortless dynamic content selection.
Understanding the Goodman GM9S80 System
The Goodman GM9S80 is a high-efficiency condensing unit designed for residential heating and cooling applications. This system utilizes a scroll compressor and a variable-speed fan motor to deliver optimal comfort and energy savings. Before installation, it’s crucial to understand the system’s components and their functions.
The unit integrates seamlessly with various thermostat options, offering programmable settings for personalized climate control. Proper airflow is paramount for efficient operation, requiring careful ductwork assessment and adjustment. The GM9S80’s design prioritizes quiet operation and reliable performance, but correct installation is key to realizing these benefits.
Familiarization with the packaging is essential before disposal, and understanding Windows personalization options—like Spotlight or slideshows—is unrelated but available. Remember, the GM9S80’s efficiency hinges on a correctly installed and configured system, ensuring years of comfortable and cost-effective operation.
Unpacking and Initial Inspection
Upon receiving the Goodman GM9S80, carefully inspect the shipping container for any signs of damage during transit. Document any visible damage with photographs before opening. Once opened, verify that all components listed on the packing list are present, including the unit itself, refrigerant lines, and installation hardware.
Thoroughly examine the unit for any cosmetic damage, such as dents or scratches. Check the fan blades for cracks or bends, and inspect the electrical connections for looseness. Ensure the refrigerant lines are properly capped and sealed. Any discrepancies or damage should be reported to the carrier and Goodman immediately.
Retain all packaging materials until the installation is complete and you are satisfied with the unit’s condition. Remember, Windows background customization is unrelated, but offers personalization options. A detailed inspection now prevents potential issues later.
Safety Precautions During Installation
WARNING: Installation of the Goodman GM9S80 requires qualified personnel. Always disconnect electrical power to the system before commencing any work. Wear appropriate personal protective equipment (PPE), including safety glasses, gloves, and work boots. Refrigerant handling requires EPA certification – follow all applicable regulations.
Be cautious when lifting and moving the unit, as it is heavy. Ensure the installation site is stable and level. Avoid damaging refrigerant lines during handling. Properly ground the unit to prevent electrical shock. Never attempt to modify or bypass safety devices.
Adhere to all local and national codes and regulations. Remember, customizing Windows 11 backgrounds is separate from these critical safety measures. Prioritize safety throughout the entire installation process to prevent injury and ensure proper system operation.

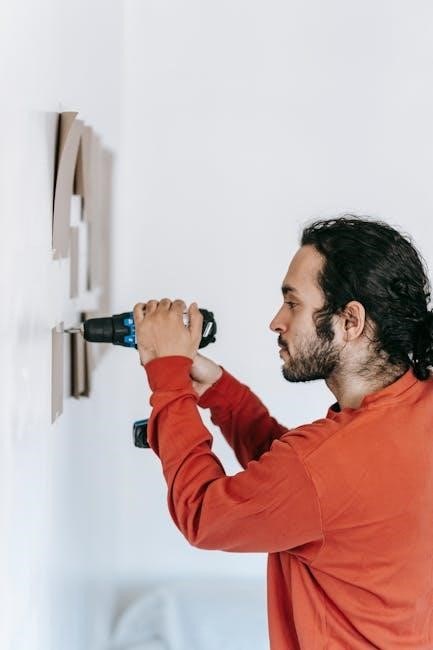
Installation Process: Step-by-Step
Begin by preparing the installation site, followed by careful electrical connections and secure refrigerant line attachments. Verify airflow and system configuration.
Preparing the Installation Site
Prior to installation, a thorough site assessment is crucial. Ensure the location can adequately support the unit’s weight and dimensions, verifying sufficient clearance for servicing and airflow. Confirm the structural integrity of the mounting surface, whether it’s a roof, slab, or ground-level pad.
Electrical access must be readily available, meeting the Goodman GM9S80’s specified voltage and amperage requirements. Check local codes for any specific grounding or wiring regulations. The site should also accommodate refrigerant lines and condensate drain lines, ensuring proper routing and protection from damage.
Clear the area of any obstructions, including debris, vegetation, and potential hazards. Level the installation surface to prevent uneven stress on the unit. Finally, verify adequate ventilation to prevent overheating and maintain optimal performance. Proper preparation minimizes installation complications and ensures long-term reliability.
Electrical Connections – Wiring Diagrams
Precise electrical connections are paramount for safe and efficient operation. Always disconnect power at the main breaker before commencing any wiring work. Refer to the detailed wiring diagrams provided with the Goodman GM9S80 unit and strictly adhere to local electrical codes.
Verify correct voltage and polarity before connecting any wires. Improper wiring can cause severe damage to the unit and pose a significant safety hazard. Use appropriately sized wire connectors and ensure all connections are tight and secure. Grounding is critical; confirm a solid ground connection is established.
Double-check all connections against the wiring diagram before restoring power. Pay close attention to the control wiring, ensuring proper communication between the unit and the thermostat. Incorrect control wiring can lead to operational issues. A qualified electrician should perform or supervise all electrical work.

Refrigerant Line Connections
Proper refrigerant line connections are crucial for system performance and longevity. Before connecting lines, ensure they are free from debris and properly sized according to the Goodman GM9S80 specifications. Use only approved refrigerant handling tools and techniques, adhering to EPA regulations.
Carefully braze or flare connections, ensuring leak-tight seals. Nitrogen purging is essential during brazing to prevent oxidation inside the lines. After completing connections, perform a thorough leak test using an electronic leak detector. Address any leaks immediately before proceeding.
Insulate all refrigerant lines to minimize heat gain or loss, maximizing system efficiency. Secure lines properly to prevent stress on connections. Verify proper superheat and subcooling after charging the system with the correct refrigerant type and amount, as specified on the unit’s nameplate.
System Configuration and Setup
Ensure optimal performance! Adjust airflow, verify thermostat compatibility, and install the condensate drain line correctly for efficient and reliable operation of your GM9S80.
Airflow Adjustment and Verification
Proper airflow is crucial for the efficient operation and longevity of your Goodman GM9S80 system. Begin by verifying that the blower motor is functioning correctly and set to the appropriate speed for the connected ductwork. Use a manometer to measure static pressure in the duct system, ensuring it falls within the manufacturer’s specified range – typically between 0.4 and 0.8 inches of water column.
Adjust the blower speed as needed to achieve the correct static pressure. Insufficient airflow can lead to reduced cooling capacity and potential compressor damage, while excessive airflow can cause noise and discomfort. Carefully inspect all duct connections for leaks and seal them with appropriate duct sealant. Finally, confirm that all registers and grilles are open and unobstructed to allow for balanced airflow throughout the conditioned space. Regular airflow verification is recommended as part of routine maintenance.
Thermostat Compatibility and Programming
Ensuring thermostat compatibility is vital for optimal Goodman GM9S80 system control. Most modern thermostats are compatible, but confirm compatibility with the unit’s control voltage (typically 24VAC). Smart thermostats offer advanced features like remote access and learning capabilities, enhancing convenience and energy savings. After installation, carefully program the thermostat according to the homeowner’s preferences and lifestyle.
Establish a schedule that balances comfort and efficiency, utilizing setback temperatures during unoccupied periods. Familiarize yourself with the thermostat’s programming options, including fan control and auxiliary heat settings. Regularly review and adjust the schedule as needed to optimize performance. Proper thermostat programming significantly impacts energy consumption and overall system effectiveness. Refer to the thermostat’s manual for detailed programming instructions.
Condensate Drain Line Installation
Proper condensate drain line installation is crucial to prevent water damage and maintain system efficiency with the Goodman GM9S80. The drain line must have a continuous downward slope, avoiding sags that can trap condensate. Use appropriately sized PVC pipe and secure it firmly with hangers to prevent movement. Ensure the drain line terminates in a safe location, such as a floor drain or outside, where water runoff won’t cause issues.
Regularly inspect the drain line for clogs or obstructions, as algae growth can restrict flow. Consider installing a condensate pump if gravity drainage isn’t feasible. A clogged drain line can trigger safety switches, shutting down the system. Thoroughly flush the line after installation to remove any debris. Following these guidelines ensures reliable operation and prevents potential water damage.

Windows 11 Desktop Background Customization
Effortlessly personalize your Windows 11 experience! Select dynamic content like Windows Spotlight, a slideshow, or a static image for your desktop background easily.
Changing the Desktop Background in Windows 11
Personalizing your desktop is a straightforward process in Windows 11, offering a variety of options to suit your preferences. To modify your background, you can easily access the settings through the Windows Settings app. A simple right-click on the desktop provides a quick menu, allowing you to select “Personalize” and then navigate to the “Background” section.
Within this section, you’ll find choices ranging from pre-installed Windows background images to solid colors, and the option to utilize your own custom pictures. You can also explore dynamic options like Windows Spotlight, which automatically updates your background with stunning imagery sourced from Bing. Furthermore, Windows 11 allows you to create a personalized photo slideshow, showcasing your favorite images in a rotating display.
Using Windows Spotlight as a Dynamic Background
Windows Spotlight offers a captivating and ever-changing desktop experience in Windows 11. This feature automatically downloads and displays stunning images from Bing, transforming your background daily with breathtaking scenery and captivating visuals. To enable Windows Spotlight, navigate to the “Background” settings within the Personalization menu.
Simply select “Windows Spotlight” from the “Personalize your background” dropdown. Spotlight not only provides beautiful imagery but also occasionally presents interesting facts and information about the displayed locations. You can even provide feedback on the images you like or dislike, helping Windows Spotlight learn your preferences and curate a more tailored experience. It’s a seamless way to keep your desktop fresh and inspiring without manual intervention.
Creating a Photo Slideshow Background
Personalize your desktop with a rotating collection of your favorite photos using the slideshow feature in Windows 11. To begin, select “Slideshow” from the “Personalize your background” dropdown menu within the Settings app. Next, click the “Browse” button to choose the folder containing the images you wish to include in your slideshow. Windows 11 supports various image formats, ensuring compatibility with your existing photo library.
You can customize the slideshow further by adjusting the image change interval, selecting a shuffle option for randomized display, and choosing how the images fit your screen. This feature provides a dynamic and personal touch to your desktop, showcasing cherished memories and favorite images automatically. It’s a fantastic way to keep your workspace visually engaging.

Advanced Windows 11 Background Settings
Customize image change intervals and mix/shuffle background images effortlessly. System folders like C:WindowsWebWallpaper and AppData store Windows 11 backgrounds.
Adjusting Image Change Intervals
Fine-tune your visual experience by precisely controlling how often your desktop background changes in Windows 11. Access the Settings app, navigate to Personalization, and then select Background. Within the Background settings, you’ll find a “Change picture every” dropdown menu.
This menu offers a range of pre-set intervals, including 1 minute, 5 minutes, 10 minutes, 30 minutes, 1 hour, 6 hours, 1 day, and a custom option. Selecting a shorter interval creates a more dynamic and frequently updated desktop, while a longer interval provides a more static and consistent visual experience.
The “Custom” option allows you to specify an exact time interval, down to the second, giving you ultimate control over the background rotation. Remember to consider your preferences and workflow when choosing an interval; a rapidly changing background might be distracting for some users.
Mixing and Shuffling Background Images
Enhance the variety of your desktop experience by utilizing the “Shuffle” and “Mix” features within Windows 11’s Background settings. Located alongside the “Change picture every” interval option, the “Shuffle” toggle randomly orders the images in your selected background folder. This prevents a predictable sequence and keeps your desktop visually fresh.
The “Mix” function, available when using multiple images, allows you to combine backgrounds from different folders into a single rotation. This is perfect for creating a diverse collection of images from various sources. To utilize this, you’ll need to select multiple folders within the “Choose a picture for your desktop background” section.
Experimenting with both “Shuffle” and “Mix” provides a highly customizable and engaging desktop background experience, ensuring a unique visual presentation each time your screen refreshes. Remember to save your changes for the settings to take effect.

Locating Windows 11 Background Image Folders
Understanding file locations is crucial for adding custom images or exploring default Windows 11 backgrounds. The primary system folder containing pre-installed wallpapers is typically found at C:WindowsWebWallpaper. This directory houses the default images shipped with the operating system.
However, user-specific background images are often stored within your user profile. Navigate to AppData, usually hidden, located within your user folder (e.g., C:UsersYourUsernameAppData). Within AppData, you may find folders related to background images, though their exact structure can vary.
Remember that accessing AppData requires enabling “Show hidden files and folders” in File Explorer’s View settings. Exploring these folders allows you to identify existing images and add your own, expanding your desktop customization options. Be cautious when modifying system files within the Windows directory.
Troubleshooting Common Installation Issues
Addressing leaks, resolving electrical problems, and diagnosing airflow restrictions are vital for a successful Goodman GM9S80 installation. Careful inspection is key!
Addressing Refrigerant Leaks
Detecting refrigerant leaks is crucial for optimal Goodman GM9S80 performance and longevity. Begin by visually inspecting all refrigerant line connections – fittings, valves, and the evaporator coil itself – for any signs of oil residue, which often indicates a leak point. Utilize an electronic leak detector, carefully sweeping it across all connections and the coil surface.
If a leak is confirmed, immediately shut down the system to prevent further refrigerant loss and environmental impact. Before attempting repairs, ensure proper personal protective equipment (PPE) is worn. Tighten any loose fittings; if tightening doesn’t resolve the issue, the fitting or valve may require replacement. For coil leaks, professional brazing or coil replacement is typically necessary.
After repairs, thoroughly evacuate the system to remove any air or moisture, then recharge with the correct type and amount of refrigerant as specified on the unit’s nameplate. Always pressure test the system after recharging to verify the repair’s effectiveness and confirm no further leaks exist.
Resolving Electrical Connection Problems
Electrical issues can significantly hinder Goodman GM9S80 operation. Always disconnect power at the breaker before inspecting or working on electrical connections – safety is paramount! Begin by verifying the voltage at the disconnect switch matches the unit’s requirements. Check all wiring connections within the control panel, ensuring they are secure and free from corrosion;
Loose connections are a common culprit; tighten any that appear compromised. Inspect wiring for damage – frayed insulation or broken wires – and replace as needed. Utilize a multimeter to test continuity and confirm proper grounding. If the contactor is faulty, replace it with a unit of the same specifications.
Review the wiring diagram specific to your GM9S80 model. If problems persist, consult a qualified HVAC technician to diagnose and resolve more complex electrical faults, preventing potential hazards and ensuring system reliability.

Diagnosing Airflow Restrictions
Reduced airflow severely impacts Goodman GM9S80 efficiency and can lead to system damage. Begin by inspecting the air filter; a dirty filter is the most frequent cause of restriction. Replace it with a new one of the correct size and MERV rating. Next, examine the blower wheel for debris or obstructions, cleaning it thoroughly if necessary.
Check the ductwork for kinks, collapses, or disconnections. Ensure all registers and vents are fully open and unobstructed by furniture or other objects. Verify the evaporator coil isn’t iced over, indicating potential refrigerant issues or airflow problems.
Inspect the return air grille for blockage. A professional may use a manometer to measure static pressure and pinpoint specific airflow restrictions within the system. Addressing these issues restores optimal performance and prolongs the GM9S80’s lifespan.