

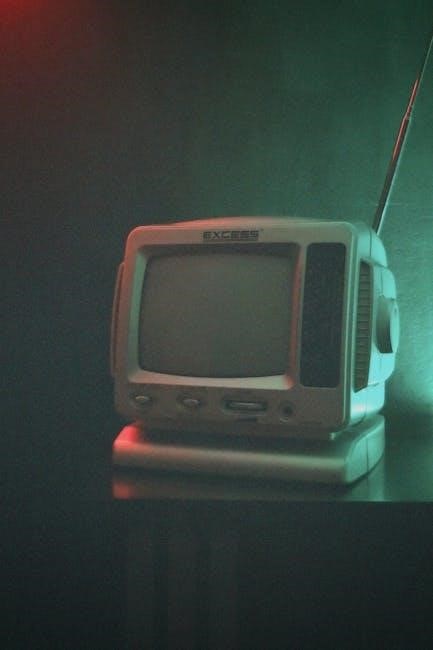
Dynex, a Best Buy house brand originating in the 1950s, gained prominence in the 2000s with LCD TVs. Comprehensive user guides, available as PDFs, ensure optimal device functionality.
What is Dynex?
Dynex represents Best Buy’s in-house brand for a range of consumer electronics, initially established in the 1950s but becoming well-known for televisions in the 2000s. While not a manufacturer itself, Dynex sources products from various companies, offering a more affordable alternative to premium brands.
The brand focuses on providing functional technology at accessible price points, particularly in the LCD and LED TV markets. User guides and support resources are crucial for maximizing the value of these devices.
History of Dynex as a Best Buy Brand
Dynex began as an independent company in the 1950s, but was later acquired by Best Buy. The brand transitioned into Best Buy’s primary house brand for televisions and other electronics in the early 2000s. This strategic move allowed Best Buy to offer competitively priced products alongside established brands.
Dynex quickly became known for providing budget-friendly options, and readily available user guides helped customers navigate their features and settings effectively.
Common Dynex TV Models (DX-19LD150A11, DX-22LD150A11, DX-32E150A11)
Dynex offered a range of LCD and LED televisions, with models like the DX-19LD150A11 (19-inch), DX-22LD150A11 (22-inch), and DX-32E150A11 (32-inch) being particularly common. These models typically featured standard definition or 720p HD resolution.
User guides for these TVs cover essential functions, including connecting devices, channel scanning, and adjusting picture and sound settings. Finding the correct manual is crucial for optimal performance.
Setting Up Your Dynex TV
Initial setup involves unboxing, connecting power and cables, linking external devices via HDMI or USB, and completing a channel scan for viewing.
Unboxing and Initial Setup
Carefully unpack your Dynex TV, ensuring all components are present – the TV itself, remote control, power cord, and any included stands or mounting hardware. Inspect for any shipping damage before proceeding. Position the TV in your desired location, considering proper ventilation. Attach the stand securely, following the provided instructions. Before powering on, double-check all connections are loose-free. The initial power-up will guide you through basic settings like language selection and country/region configuration, preparing the TV for channel scanning.
Connecting to Power and Basic Cables
Plug the power cord into a grounded outlet to power on your Dynex TV. For basic cable connection, use a coaxial cable, screwing it into the “Cable In” port on the TV and the wall outlet. If using an antenna, connect it to the “Antenna In” port. Ensure all cables are firmly secured. Avoid using damaged cables. Power surge protectors are highly recommended to safeguard your TV from electrical fluctuations and potential damage during storms.
Connecting External Devices (HDMI, USB, Component)
For high-definition devices, use HDMI cables, connecting them to the HDMI ports on both your TV and the device (Blu-ray player, game console). USB ports allow for media playback from flash drives or external hard drives. Component connections (red, green, blue) are for older devices. Ensure the correct input source is selected on your TV using the remote. Properly labeled cables simplify setup and prevent confusion during device connection.
Initial Channel Scan and Setup
After connecting basic cables, initiate a channel scan within the TV’s menu. This process automatically searches for available over-the-air channels. Select your region and scan type (Antenna, Cable, or both). The TV will store discovered channels, allowing easy access. You may need to re-scan periodically for updates. Ensure your antenna or cable connection is secure for optimal results during the scanning process.
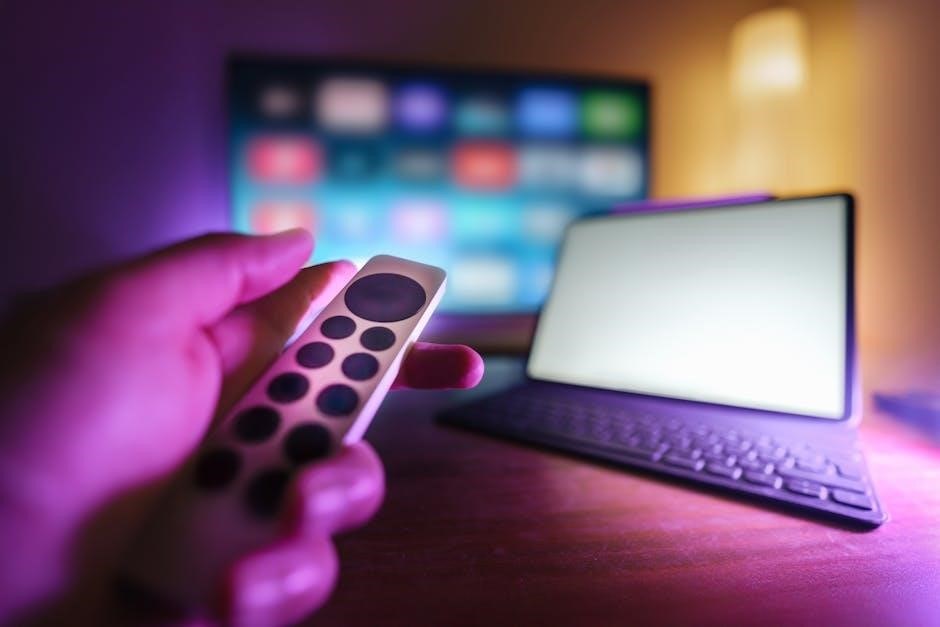
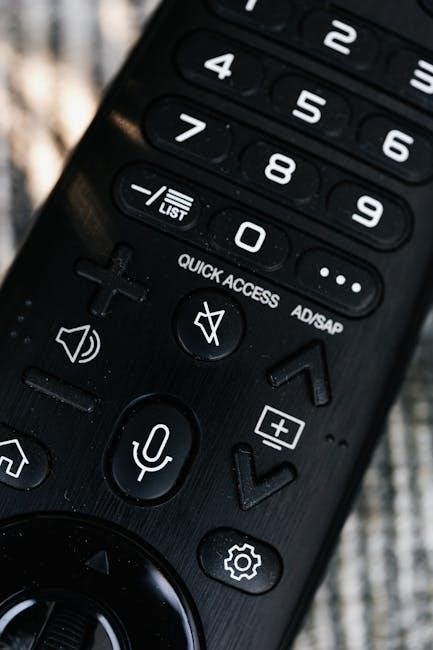
Understanding Your Dynex TV Remote
The Dynex remote controls all TV functions. Familiarize yourself with button layouts for power, volume, channel selection, and menu navigation for seamless operation.
Remote Control Button Functions
The Power button initiates or terminates TV operation. Volume controls adjust audio levels, while Channel Up/Down navigate broadcasting. The Menu button accesses on-screen settings. Input selection switches between connected devices like HDMI or USB. Numeric keypad enables direct channel entry. Navigation arrows facilitate menu exploration, and OK/Enter confirms selections. Familiarity with these functions unlocks full control of your Dynex TV, enhancing your viewing experience.
Using the Menu Button
Pressing the Menu button on your Dynex remote unveils the On-Screen Display (OSD), granting access to vital settings. Here, you can adjust Picture settings like brightness and contrast, customize Sound options including equalizer presets, and manage Input Sources. Explore Channel settings, configure Parental Controls, and initiate a Factory Reset if needed. Navigating with arrow keys and confirming with ‘OK’ allows precise control over your TV’s functionality.
Navigating the On-Screen Display (OSD)
The Dynex OSD utilizes a straightforward menu system. Use the arrow keys on your remote to highlight desired options – Picture, Sound, Input, Channel, and Settings. Press ‘OK’ to select. To return to the previous screen, press ‘Menu’ or ‘Back’. Explore submenus for detailed adjustments. Remember that the layout may slightly vary depending on your specific Dynex TV model, but the core navigation principles remain consistent for user-friendly control.

Dynex TV Features and Settings
Dynex TVs offer adjustable picture and sound settings, input source selection, and aspect ratio options. These features enhance your viewing experience and customization.
Picture Settings (Brightness, Contrast, Color)
Adjusting picture settings on your Dynex TV allows for a personalized viewing experience. Brightness controls the overall lightness or darkness of the image, while contrast defines the difference between light and dark areas. Fine-tune the color level to achieve vibrant and accurate hues. Experiment with these settings to optimize picture quality based on your preferences and the content you are watching. Remember subtle adjustments often yield the best results, avoiding overly saturated or washed-out images. Explore preset modes for quick optimization.
Sound Settings (Equalizer, Surround Sound)
Dynex TV sound settings offer customization for an immersive audio experience. Utilize the equalizer to adjust specific frequency ranges – boosting bass for impactful sound or enhancing treble for clearer dialogue. Explore surround sound options, if available, to create a wider soundstage. Adjust volume levels carefully to avoid distortion. Preset sound modes, like ‘Movie’ or ‘Music’, provide quick optimization. Experiment to find the settings that best complement your content and listening preferences for optimal audio clarity and enjoyment.
Input Source Selection
Selecting the correct input source on your Dynex TV is crucial for viewing content from external devices. Use the ‘Input’ or ‘Source’ button on your remote to cycle through available options like HDMI 1, HDMI 2, Component, or USB. Ensure your device is properly connected to the corresponding port before selecting the input. The On-Screen Display (OSD) will indicate the current input. If no signal is detected, double-check the cable connections and device power.
Aspect Ratio and Zoom Options
Dynex TVs offer various aspect ratio and zoom options to optimize the viewing experience for different content. Access these settings through the ‘Picture’ menu. Common options include ‘Wide,’ ‘Standard,’ ‘Zoom,’ and ‘Full.’ ‘Wide’ preserves the original aspect ratio, while ‘Zoom’ may stretch the image to fit the screen. Experiment with these settings to find the best fit for movies, TV shows, and other media, avoiding distortion or black bars.
Troubleshooting Common Dynex TV Issues
Common issues like no picture or sound, remote malfunctions, and connectivity problems are addressable. Consult the user guide for step-by-step diagnostic solutions.
No Picture Issues
If your Dynex TV displays a black screen, first verify the power connection and ensure the TV is switched on. Check the input source selection, confirming it matches the connected device. A faulty HDMI cable can also cause this; try a different cable or port.
Review the user guide’s troubleshooting section for specific model instructions. If the issue persists, a factory reset (detailed in the manual) might resolve software glitches. Consider contacting Best Buy support for further assistance if these steps fail.
No Sound Issues
Experiencing no sound from your Dynex TV? Begin by checking the volume level, ensuring it’s not muted or set too low. Verify the correct audio output is selected within the TV’s sound settings – options include TV speakers, HDMI ARC, or optical audio.
Consult your Dynex TV’s user guide for specific sound configuration instructions. Test with different audio sources to isolate the problem. If issues remain, a factory reset might help, or contact Best Buy support for expert guidance.
Remote Control Not Working
If your Dynex remote isn’t responding, first replace the batteries with fresh ones, ensuring correct polarity. Check for obstructions between the remote and the TV’s IR sensor. Try resetting the remote by removing and reinserting the batteries.
Refer to your Dynex TV user guide for remote pairing instructions, if applicable. If problems persist, a universal remote can be a temporary solution, or contact Best Buy support for assistance with a replacement.
Connectivity Problems (HDMI, USB)
Experiencing issues with HDMI or USB connections? First, ensure the cables are securely plugged into both the TV and the external device. Try different HDMI ports on your Dynex TV. For USB, verify the device is compatible and the file format is supported.
Consult your TV’s user guide for specific device compatibility. A power cycle of both the TV and the connected device can often resolve connection errors. If issues remain, test with a different cable;
Advanced Dynex TV Settings
Explore refined picture and sound options, including closed captioning and parental controls. A factory reset restores default settings for troubleshooting or a fresh start.
Closed Captioning Options
Dynex TVs offer a range of closed captioning features to enhance accessibility. Users can typically enable or disable captions, adjust text size, and customize the font style and color for optimal readability. Explore options for different caption languages, if supported by the broadcast signal.
Settings often include choices for displaying captions on screen – such as pop-on, roll-up, or paint-on – catering to individual preferences. Access these settings through the TV’s menu, usually found within the accessibility or captioning section. Proper configuration ensures a comfortable viewing experience for all.
Parental Controls
Dynex TVs include parental control features to restrict access to certain content. Users can set up a PIN code to lock channels or programs based on their ratings, preventing unwanted viewing. These controls allow customization, blocking specific channels or rating levels.
Access the parental control settings through the TV’s menu, typically found within the settings or security section. Remember to choose a secure PIN that is not easily guessed. Regularly review and adjust these settings to ensure they align with your household’s preferences and viewing guidelines.
Factory Resetting Your Dynex TV
A factory reset restores your Dynex TV to its original settings, erasing all personalized configurations. This is useful for troubleshooting persistent issues or preparing the TV for resale. Access the reset option through the TV’s menu, usually located within the settings or system section.
Be aware that this process will delete saved channels, network settings, and account logins. Confirm your decision as the reset cannot be undone without reconfiguring everything manually. Ensure the TV remains powered on throughout the entire process to avoid potential damage.
Finding Dynex TV Manuals and Support
Dynex manuals are readily available as downloadable PDFs from sites like Manualzz and Manualzilla, alongside Best Buy’s support resources and online communities.
Downloading PDF Manuals (Manualzz, Manualzilla)
Accessing Dynex TV manuals is simplified through online repositories like Manualzz and Manualzilla. These platforms host a vast collection of downloadable PDF user guides and service manuals for various Dynex models, including the DX-19LD150A11 and DX-32E150A11.
Users can easily search, preview, and download these manuals for free, providing detailed instructions for setup, troubleshooting, and maintenance. These resources are invaluable for maximizing your Dynex TV experience and resolving common issues independently.
Best Buy Support Resources
Best Buy offers comprehensive support for Dynex TVs, as it is their house brand. Customers can find assistance through the Best Buy website, accessing FAQs, troubleshooting guides, and contact information for their customer service team.
Live chat support and phone assistance are typically available, providing direct help with setup, operation, and resolving any issues encountered with your Dynex television. Explore their online resources for a seamless user experience.
Online Forums and Communities
Numerous online forums and communities dedicated to TVs and home entertainment often feature discussions about Dynex models. These platforms provide a valuable space for users to share experiences, troubleshooting tips, and solutions to common problems.
Searching online can connect you with fellow Dynex TV owners who may have encountered and resolved similar issues, offering peer-to-peer support and helpful advice beyond official documentation.
Dynex TV Maintenance
Regular cleaning of the screen, ensuring proper ventilation, and utilizing surge protectors are crucial for extending the lifespan and maintaining optimal performance of your Dynex TV.
Cleaning Your TV Screen
Maintaining a clean screen is vital for optimal viewing. Always disconnect the TV from power before cleaning. Use a soft, dry, lint-free cloth to gently wipe the screen. Avoid harsh chemicals, abrasive cleaners, or excessive moisture, as these can damage the display.
For stubborn smudges, lightly dampen the cloth with distilled water – never spray directly onto the screen. Gently wipe, then immediately dry with a separate, clean, dry cloth. Regular dusting prevents buildup and preserves picture quality, ensuring a consistently enjoyable viewing experience with your Dynex TV.
Proper Ventilation
Adequate ventilation is crucial for your Dynex TV’s longevity. Ensure the TV isn’t enclosed in a tight space, allowing airflow around all sides and the rear. Blocked vents can cause overheating, potentially leading to performance issues or component failure.
Maintain at least a few inches of clearance on all sides. Avoid placing the TV near heat sources or in direct sunlight. Proper airflow helps dissipate heat effectively, contributing to a stable and reliable operating temperature for your television.
Protecting Against Power Surges
Power surges can severely damage your Dynex TV’s sensitive electronic components. To safeguard against this, always connect your TV to a surge protector. A surge protector absorbs excess voltage from spikes caused by lightning or electrical disturbances, diverting it away from your TV.
Consider a UPS (Uninterruptible Power Supply) for added protection, providing battery backup during outages. Avoid plugging the TV directly into the wall, especially in areas prone to electrical fluctuations.

Understanding Dynex TV Technology
Dynex TVs utilize both LED and LCD technologies, offering varying picture qualities and energy efficiency. HDTV resolution impacts image clarity, while some models feature smart capabilities.
LED vs; LCD Technology in Dynex TVs
Dynex employed both Liquid Crystal Display (LCD) and Light Emitting Diode (LED) technologies in their televisions. LCD TVs utilize a backlight to illuminate the pixels, while LED TVs use an array of LEDs for backlighting.
LED backlighting generally offers improved brightness, contrast, and energy efficiency compared to traditional LCD backlights. Different LED configurations, like edge-lit or full-array, further impact picture quality. Understanding these differences helps users appreciate the visual experience their specific Dynex model provides and informs potential upgrades.
HDTV Resolution Explained
HDTV resolution defines the clarity and detail of the picture displayed on your Dynex TV. Common resolutions include 720p (1280×720 pixels), 1080p (1920×1080 pixels), and, less frequently in older Dynex models, 4K Ultra HD (3840×2160 pixels).
Higher resolutions mean more pixels, resulting in a sharper, more detailed image. 1080p was the standard for many years, while 4K offers four times the resolution of 1080p. Understanding your TV’s resolution helps optimize settings and content selection for the best viewing experience.
Smart TV Features (If Applicable)
Some later Dynex TV models incorporated “smart” functionality, though this was less common than with other brands. These features allowed direct access to streaming services like Netflix, Hulu, and YouTube via a built-in internet connection and apps.
Users could navigate these services using the remote control. However, many older Dynex TVs lacked smart capabilities, functioning solely as displays for external devices. Check your model number to confirm smart features.

Dynex TV Safety Precautions
Ensure electrical safety, stable placement to prevent falls, and avoid screen damage. Proper handling and a surge protector are crucial for longevity.
Electrical Safety
Always connect your Dynex TV to a properly grounded outlet. Avoid using extension cords or adapters, as they can increase the risk of electrical shock or fire. Never expose the power cord to moisture or damage. If the cord is frayed or damaged, immediately discontinue use and contact Best Buy support for assistance.
Ensure the voltage of your outlet matches the TV’s requirements, listed on the back panel. Disconnect the TV from the power outlet during lightning storms or prolonged periods of non-use to protect against power surges. Do not attempt to repair the TV yourself; this could be dangerous.
Placement and Stability
Position your Dynex TV on a stable, level surface capable of supporting its weight. Avoid placing it on unstable carts or stands that could tip over. Ensure adequate ventilation around the TV to prevent overheating; do not block ventilation openings.
Keep the TV away from direct sunlight, heat sources, and excessive moisture. If mounting the TV on a wall, use a VESA-compatible mount designed for the TV’s size and weight, and follow the mount’s installation instructions carefully. Secure all cables to prevent tripping hazards.
Avoiding Damage to the Screen
Protect your Dynex TV’s screen from physical impact, as it is a delicate component. Avoid pressing hard on the screen or allowing objects to come into contact with it. When cleaning, use a soft, dry cloth; never use abrasive cleaners or liquids directly on the screen.
Be cautious when moving the TV, always holding it by the frame, not the screen. Avoid exposing the screen to extreme temperatures or prolonged direct sunlight, which can cause discoloration or damage.
Disposing of Your Old Dynex TV
Responsible disposal is crucial; explore recycling options to prevent environmental harm. Avoid landfill disposal and adhere to local electronic waste regulations.
Recycling Options
Many communities offer electronic recycling programs specifically for televisions. Best Buy itself frequently hosts e-waste recycling events, accepting old Dynex TVs for responsible processing. Check with your local waste management authority for designated drop-off locations or collection dates. These programs ensure valuable materials are recovered, reducing landfill waste and minimizing environmental impact. Additionally, some manufacturers partner with recycling facilities, providing convenient options for consumers. Prioritize these avenues over improper disposal.
Responsible Disposal Practices
Improperly discarding your Dynex TV can harm the environment due to hazardous materials like lead and mercury. Never simply throw it in the trash. Explore certified e-waste recyclers who adhere to strict environmental standards. Data security is also crucial; consider a factory reset before disposal to erase personal information. Avoid dismantling the TV yourself, as this can release harmful substances. Prioritize recycling programs and responsible e-waste management for a sustainable outcome.